To log observations on a time sampling base, you can automatically create Events with a fixed length, that cover your required interval. You can create intervals in three different ways:
oCreate equally long DataSets, within the time frame covered by the currently selected DataGroup
oCreate interval based Events, within the time frame covered by the currently selected DataSet (= session).
oCreate interval based Events, within the time frame covered by the currently selected Event.
Example: Imagine, that you are observing a test person for exactly 10 minutes and you need to log the variation in emotion of this person, during those 10 minutes. This can be done, by judging his/hers emotional state every 30 seconds. To do so, the 10 minutes need to be divided into 20 parts of 30 seconds. INTERACT can do this for you:
To create predefined fixed intervals, follow these steps:
DataSet-based Time Sampling Session
Create DataSet
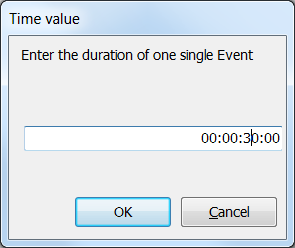
Before you can split an element, you need to specify its duration:
▪Manually create a new DataSet by choosing Insert - Elements - Add DataSet ![]() .
.
▪Position the video to the start point of your session.
▪Drag the time value from the Timer display into the onset field of the selected DataSet.
▪Position the video at the end of your session.
▪Drag the time from the time code field into the offset field of the selected DataSet
Note: You can also manually enter start- and end time value for this DataSet, corresponding to the start- and end times of the part of the video that needs to be analyzed. E.g. 00:00:02:10 – 00:12:00:09
| TIP: | To enter the time information with the help of short cuts: - Select the DataSet and position your video at the start point of the session. - Press CTRL+1 to enter the current time code, as displayed in the Video Controls, as the start time of the current selection. - Position the video at the end of the test - Press CTRL+2 to enter the current time code as the end time of the current selection. |
Split DataSet
This methods automatically creates as many lines, with a predefine duration, as do fit into the selected time frame:
▪Select the DataSet in the current document (in our example, a duration of 10 minutes)
▪Click Transform - Restructure - Time Split ![]() .
.
▪In the upcoming Dialog, enter your interval length as a time code value:
In this example, INTERACT creates 20 Events, each one with a duration of 30 seconds. (Summarized, the duration of those Events, covers the complete duration of your DataSet)
Event-based Time Sampling
Similar to creating interval-based Events, that cover the total duration of the selected DataSet, it is possible to create intervals based on a selected Event. This can be useful if you logged Event-based situations, and need to add interval-based information for specific Codes only.
If you select one or multiple Events before you run the Time Split command, an additional message appears:
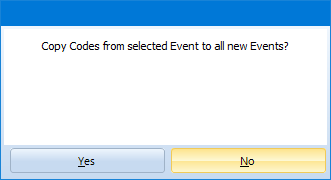
This allows you to copy all Codes from the selected Events into the new Intervals, to ensure the correct logical connection.
Split DataGroup
The same Time Split command cann also be used to split a DataGroup into equal DataSets.
This can be helpful if you have a long video, in which every so many minutes a new session or task is started. You can automatically create DataSets for each of those periods.
This only makes sense if all Task/Session periods start at a fix interval of course.
Note: To be completely accurate, INTERACT creates 21 Events in this example, whereas the last Event comprises only 1 frame. This is due to the fact that the start- as well as the end time code of each Event, is included in its duration, because those are in fact 2 full video frames. The value 00:00:00:00 in our example is therefore the first video frame of the fist 30 seconds interval, thus we have 29 seconds and 24 frames left (with 25 fps), to complete the interval. At the end remains the frame of time code 00:10:00:00, because the duration from 00:00:00:00 to 00:10:00:00 in fact is 10 minutes and 1 frame. Therefore, the last (21st) Event has only a single time code, because its duration is only one frame; select this Event and this information is also shown in the status area in the upper left corner of the INTERACT Document. We choose the set up if example to show you this issue. Correct would have been to enter a DataSet length of exactly 10 minutes like this: 00:00:00:00 to 00:09:59:24
▪Read Log Codes in predefined intervals, to learn how you describe the behavior occurring in the just created intervals.