Scenario Properties

<< Click to Display Table of Contents >>

Navigation:  Configure VideoSyncPro Studio > Design Recording Templates >

Scenario Properties

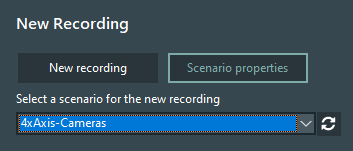
Selecting the correct scenario based on the name alone may be challenging if you have many cameras and multiple rooms.

That is why you can add a description to each Scenario so that the user can verify its purpose precisely.

To collect metadata, make use of the questionnaire functionality.

Scenario Description

To describe the purpose of a specific scenario, enter the information in the Description section of the Scenario Properties:

If no Scenario is 'open', select a Scenario and click New Recording to open a new session based on the selected Scenario.

Select Scenario properties from the menu Next Topic or click on the Scenario Properties icon VSP_btn_ScenarioProperties.

A dialog appears, in which you can enter a plausible Description for the current Scenario, like this:
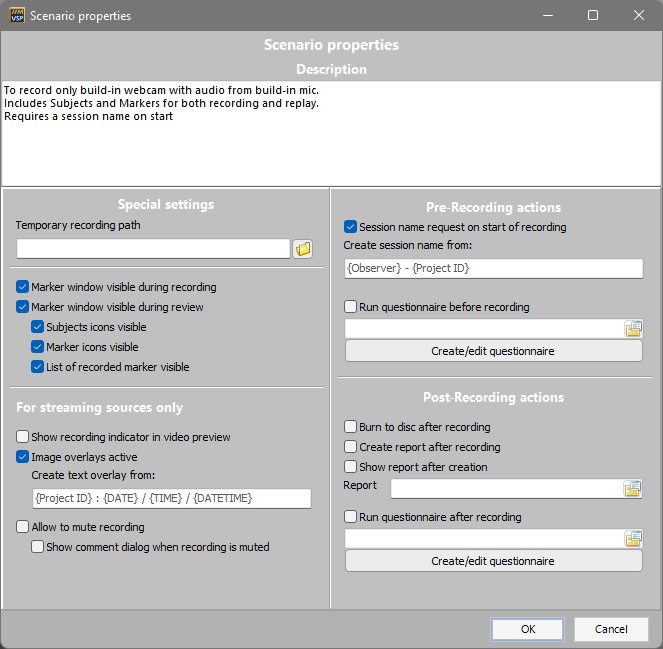
vsp_scenario_settings

Description

This information is available on the main screen, the moment this scenario is selected:

Next Topic

Special Settings

In this section, you can show and hide part of the available functions per scenario, to limit or expand the functionality, depending on the area of application.

Temp Storage Folder

At the bottom of this dialog, you can specify a temporary recording folder. This is of interest for anyone who does not want to store their videos locally.

IMPORTANT: We strongly recommend to ALWAYS record the videos on a local drive, to ensure successful sessions.
If you do not want to store the final recordings on that drive, you can specify a local temp recording folder per Scenario and activate the Move Session after recording option.

If you do so, VideoSyncPro Studio automatically moves the recording session from this temp folder to the regular storage folder as specified in the program wide Storage Settings at the end of each recording.

Note: Depending on the length of the recording and the number of cameras, moving all video files might take a while. You cannot start a new recording until the previous files are moved.

Marker Related Settings

These Settings are only relevant if you own the Marker Add-on:

Decide if Markers can be logged only during recording or only while reviewing a previous recording, or both by disabling or enabling the options Marker window visible during recording and Marker window visible during review.

If you only want to enter Codes for your Markers* but no Subjects, deactivate the Subjects icons available option to hide the person symbols for the current scenario.

If you only want to enter Subjects and no Codes for your Markers*, deactivate the option Marker icons available to hide the marker symbols for the current scenario.

To hide the list of already logged Markers, clear the selection for List of recorded marker visible.

*) Only available for sites that purchased the coding add-on for VideoSyncPro Studio. Details about this functionality can be found in Log Observations.

Video Stream Sources only

Show recording indicator in video preview - To get a blinking text block in the upper right corner, to indicate a recording is running or not:
VSP_OverlayPREVIEW VSP_OverlayREC

Note: This recording state information is NOT visible in the resulting recording.

Image overlays active - Enables you to insert text into your recording. The default text shows date and time in the upper left corner of the recording.

Allow to mute recording - A Pause-button enables the user to mute a recording, which means that the image is turned of for the time the recording is muted. A black screen appears during replay instead.
Thus the recording is NOT stopped, only painted black.

Show comment dialog when recording is muted - A comment dialog appears to describe the reason for muting the recording, e.g. 'Client conversation'.

Confirm your entries by clicking OK.

IMPORTANT: Changes in the Scenario properties are instantly saved in the current Scenario, the moment you confirm your changes with OK.
If you want a copy with different settings, you need to select Save Scenario as... from the menu Next Topic and use another name for the new Scenario file.

Pre-recording Actions

Before the actual recording starts, you can ask for a session name and run a questionnaire:

To disable the upcoming dialog to name a session, clear the Session name request on start of recording option.

If you want to run a questionnaire at the start of a recording, for instance to collect a number of recording related details about the participants, location, setup, etc.:

Select the option Run Questionnaire before recording.

Select a questionnaire you created and stored on your recording station.

Post-recording actions

Once you click STOP to end a recording, you can again start a number of actions that should be performed automatically:

Select Burn to disc after recording if that is required.

Select Create report after recording, if a project specific report is available.

Select Show report after creation if a report has be prepared.

Select the option Run Questionnaire after recording.

Select a questionnaire you created and stored on your recording station.

Hidden Properties

There are a few additional properties that can only be set or specified outside the GUI of VideoSyncPro Studio. It requires manual editing of the scenario file using a text editor. Some properties are valid for the scenario as such, others need to be edited per source.

All scenarios are stored as *.MVSScenario files and located in this folder:
C:\Users\Public\Documents\Mangold VideoSyncPro Studio Data\Scenario

oPTZ speed - It is possible to reduce the speed at which PTZ cameras can be moved around. For details, read PTZ Control.

oAudio on during record - It is possible to activate the Listen-in function during recordings per default for a specific scenario.

Add the line AudioIsOn=1 for a specific source to activate the audio button automatically, when using that scenario.

oScripting - It is possible to activate define and assign scripts to a specific scenario. Scripts allow you to combine a number of actions into a single command that becomes available as a single knob in the Remote Observer. For details, read Scripting Abilities.

o