If you do not have any recorded video material available (yet), you can use INTERACT also for live observations. In this case, you are not able to reproduce any of the observed behavior, but all statistic and visualization routines are available for the live collected data just as well.
In addition, if you do make recordings of the live situation while you code, you can synchronize the live recorded data with your video, allowing you to reproduce after all!
All statistical and analytic functions, can be applied to the collected data, no matter if you are using a video or not.
How it works
Per default INTERACT uses the current system time to simulate a time code (i.e. current time in time code format hh:mm:ss:frames or hh:mm:ss.ms).
This guarantees that your recorded "real life observation" data is comparable to any other data recorded. It also guarantees that synchronization to any video is easily possible afterward.
Note: The default fps value (30 or 25 fps, depending on your settings) is used for your Live Coding document. If you record and digitize your video material at another frame rate, you better change the document frame rate before logging live Events.
Select Live Observation Source
If you want to use INTERACT during a live observation:
▪Click Start - Observation - Observation settings ![]()
▪Select Live Observation as you Observation source (select Multimedia Codingto return to multimedia-based sources).
▪Confirm your settings with OK.
The moment you start coding, the current computer time simulates an ongoing time code.
oThis time information is used, to enter the time reference while logging Events.
oThe number of frames displayed is based on the current data file.
oIn case you do record the live coded situation for in-depth analysis later on, make sure the data file fps value matches that of the resulting video!
oNo video control buttons are available.
The Observation Controls change like this:

Time Setting
The three clock buttons enable you to influence the time code information shown.
As a default, the time code reflects the current system time.
▪Click the first clock to activate the current system time, displayed as a time code.
▪Click the second clock to define a specific start time value.
▪Click the third clock, to reset the ongoing time value to the time defined for the second clock.
▪Click ![]() .
.
An ongoing time value appears in the Timer display.
During the process of logging behavioral Events, INTERACT - as always - uses the time information in the Observation Controls to set the start time and offset values of each logged item.
In this case, the current system-time of the computer (or a specific pre-set value, set by the second clock).
Start from Zero
If you want to reset the time to your predefined value (00:00:00:00 per default) the moment you log your first Event, you need to activate the corresponding option in the Observation Settings:
•Click Start - Observation - Observation settings ![]() .
.
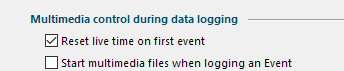
•Select the option Reset live time on first Event:
Record Video During a Live Observation
Often, a life coded session is also recorded on video, for later in-depth analysis or to be able to reproduce any live observations.
In order to synchronize those recordings with your live logged data, read the section Synchronize recordings with live data.
| TIP: | To learn how to synchronize live data with the simultaneously recorded video later, see Moving the video time value. |