This topic explains how INTERACT can help you to extract multiple contingencies with a single command.
It allows you to easily identify all kind of latencies between multiple sets of Codes with a single command. This can be of help to:
oExtract reaction times while presenting objects, toys or treats to children or animals as well as to
oCompare the efficiency of different teams performing specific tasks
oAnalyze any other situation where the latency between two Codes provides you with interesting information.
Presume you want to compare performance of teams that need to perform specific, situation dependent activities. With INTERACT, it is sufficient to just cleverly code any of the occurrences as they appear and make use of INTERACTs flexibility to extract any latencies between activities.
If there are only a few Codes to compare, running the Contingency Analysis to create latency Events, between the activities that are of interest to you, is all it takes.
Whenever there is a bunch of such dependent activities and you need to produce a latency report on a regular base, it is best to create a Workflow that does the job for you, in single pass!
Example: You need to examine the performance of different teams during a medical simulation in the emergency room. In order to do this, markers were set for the instances when any of the team members ('Nurse', 'Doctor', 'Trauma Surgeon', etc.) arrived at the scene and for every action that was taken during the session, using Codes like 'Airway Assessed', 'Heart Rate Palpated' etc. To generate a report that provides you the latencies to each of those actions in relation to the arrival of specific team members, requires a near countless number of repetitions using the contingency analysis manually.
To simplify this, we created an Extension in which all interesting combinations are specified - allowing the user to simply run this script to get all required latencies with a single command.
This very specific medical simulation script can be adapted to your Codes quite easily, once you understand what it does and how it is build up. That is why this topic explains it all in detail.
EPIC Codes
In this example, all activities were logged with this set of Codes referred to a system named EPIC:
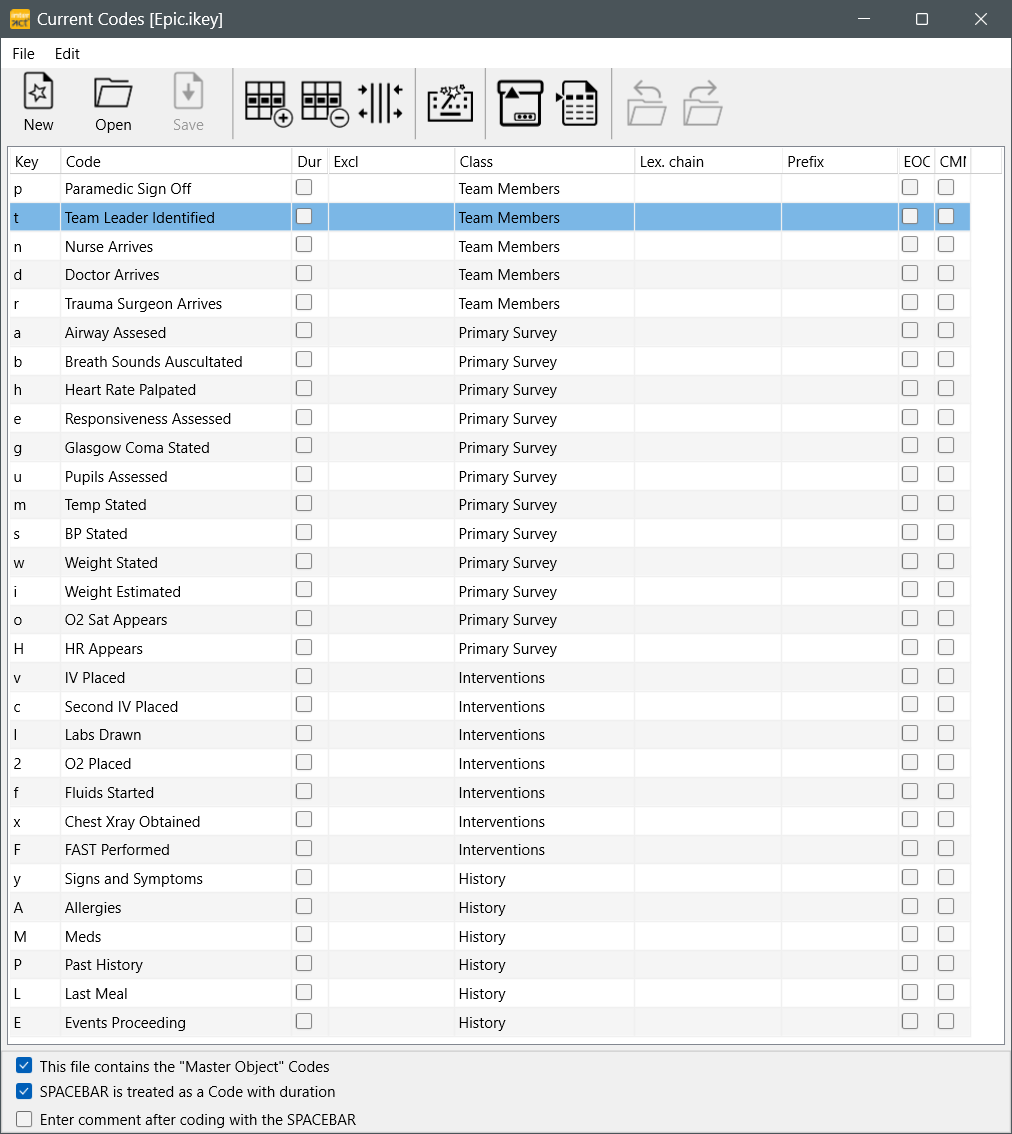
Notice that all those Codes are logged without duration. But don't worry, you can use duration Codes just as well!
EPIC Data
The data was collected in a separate DataSet per team:

You can analyze as many teams or situations as you like - there is no limit to the number of Sets.
| TIP: | If you collect your data in separate files, you can use the command Start - Files - Merge |
EPIC Analysis Manually
To identify how long it takes each team for example to place the IV after the Nurse arrives, you can do so using the Contingency Analysis and specify the 'Nurse arrives' as Code 1 and the Code 'IV Placed' as Code 2 and picking a contingency interval that covers at least the duration of the whole session, entering a name for the new Events like this:
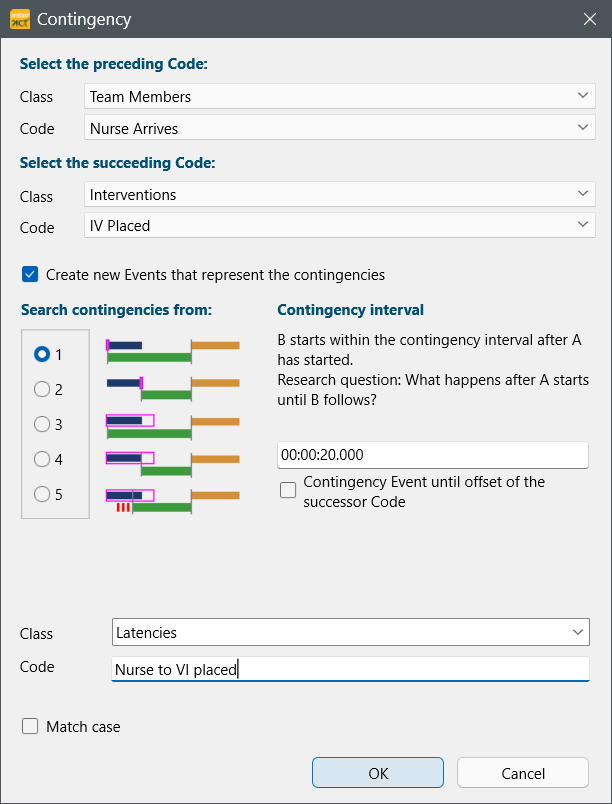
This results in a new Event with the Code as specified that covers the latency we are looking for.
So basically, no special routine is required to get the information you need!
But, repeating this for all team members in combination with all activities, still is a lot of similar steps that are time consuming and probably result in mistakes, because a combination was forgotten of the new Code was not renamed correctly.
Note: Before you continue, it is important to understand the relevance of preceding (Code 1) and succeeding (Code 2) Codes that are compared, because those need to be specified in the Workflow, to match your data!
EPIC Analysis Extension
INTERACT offers a script that performs the Contingency analysis routine for all specified combinations in one pass!
IMPORTANT: The script creates Events between the start time of the preceeding Code and the start time of the succeeding code, like when you use the Contingency analysis with the above settings. To adapt the search, the scripts offers some expert properties as explained at the bottom of the topic Adapt Multiple Contingencies Script
•If you have data logged with the exact EPIC codes as listed, select Text - Advanced - Analysis ![]() > Special Data Analysis - MedSim - MedSim Checklist analysis.
> Special Data Analysis - MedSim - MedSim Checklist analysis.
A dialog asks you to confirm that you want to perform the routine on the current document.
Once you confirm, the routine performs as many contingency searches as specified in the script (24 times in this particular case!) and opens the Timeline Chart for all data the moment it is finished.
What to expect?
Presume you have logged all activities for a single team like this:

Running the MedSim Checklist analysis routine as it is, creates the following Events instantly:
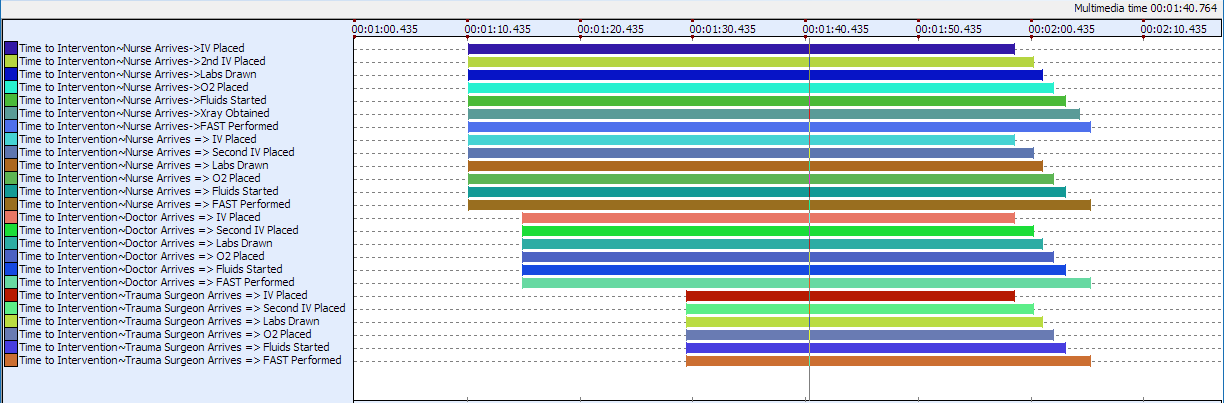
These new Events each represent the duration between a team member arriving at the emergency room and each of the interventions that were logged!
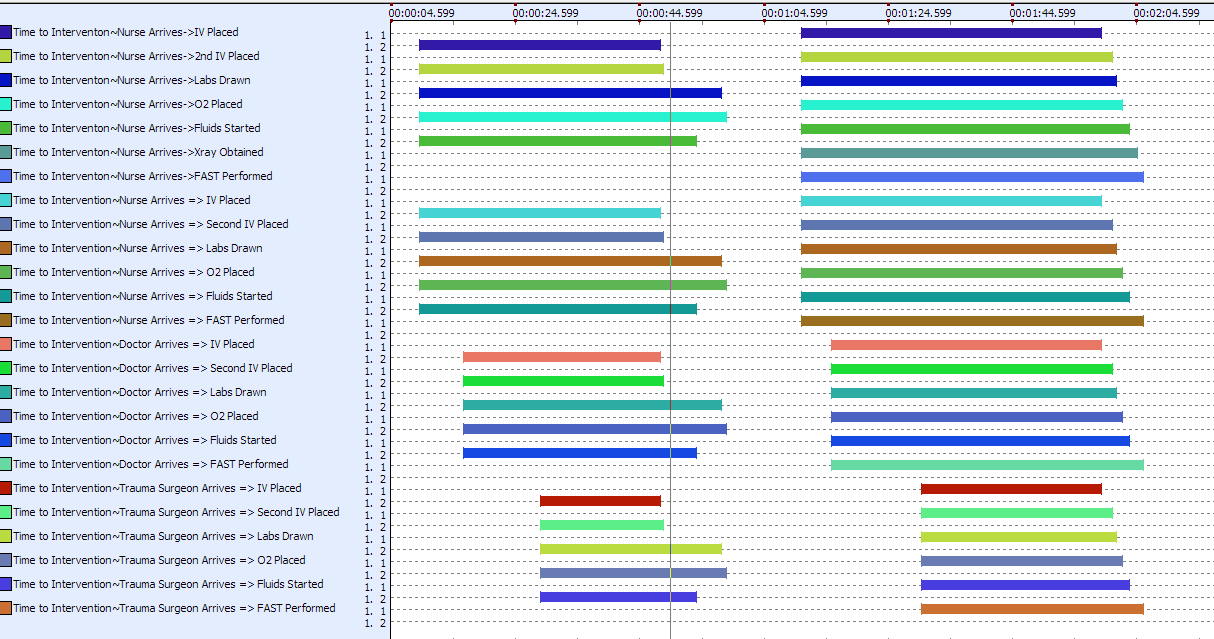
Looking at the results for both Teams, the picture looks like this:
And, as always, the statistics for all Events shown in the Timeline Chart (available through Analysis - Evaluation - Timeline Chart ![]() ) can be viewed in either the Statistics per DataSet or the Full Statistics:
) can be viewed in either the Statistics per DataSet or the Full Statistics:

In this overview, you can easily recognize that for those interventions Team 2 performed better than Team 1.
Note: For all that do code with the EPIC Codes exactly as listed above, they can use this routine as it is. All others can adapt the script to their needs.
•Read Adapt Multiple Contingencies Script to learn how you can make use of this powerful routine.