This is a detachable ribbon and can be torn of as a floating Observation panel.
The available controls only appear if you open at least one video or switch to the live-observation mode.
If you are in Live Observation mode, the current time information is shown here instead.
Per default, the Observation Ribbon is available underneath the main toolbar:

 |
Observation Ribbon - Detachable ribbon with multimedia controls and observation relevant commands. |
 |
Multimedia Progress Bar - Progress indicator for the duration of the current multimedia file(s). |
 |
Timer display - Shows the current multimedia time or an ongoing time value during a live observation. The time format can include a date (year-month-day) and the default time is displayed as a Timecode, showing Hours:Minutes:Seconds:Frames. |
 |
Position Slider - Shows the current position of the multimedia file(s). |
 |
Current Coding Mode - Displays the Coding mode, as selected in the Observation settings. |
 |
Multimedia Controls - Detailed explanation under Available Multimedia Controls, in the INTERACT User guide – hints appear if you move your mouse over the buttons. |
 |
Play selected - Plays the currently selected item(s) from start time to offset (successively). |
 |
Speed control - Enables you, to change the play speed of the multimedia file(s), by increasing (=faster) or decreasing (=slower) this value. |
 |
Time Control Options - Define Step width, search speed and pre-roll for individual multimedia control. |
 |
Start Observation - Activates the Observation mode, which is obligatory to log behavioral Codes. |
 |
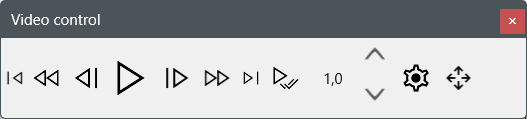
Detach Controls - Pin to detach the video controls from the Observation ribbon, allowing you to move the video control to another window, resulting in a small floating Video Controls dialog: |
Multimedia progress bar
This Multimedia Progress Bar is visible, if at least one video has been opened, and covers the total duration of your video.
oThe Position Slider indicates the position of the current multimedia file(s).
oDrag the slider with your mouse, to position your video.
oClick inside the progress bar, to position the video at the next (or previous) step, as is predefined as your preferred step width.
Available Multimedia Controls
|
Play - Plays forward at regular speed or at the speed set using the speed control arrows. |
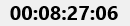 |
Timer Display - Shows the current multimedia time or an ongoing time code based on the current time during a live observation. The time format can be Hours:Minutes:Seconds:Frames or .Milliseconds |
|
Pause - Pauses the video at the current position, only visible when the Video is playing. |
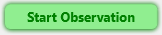 |
Start Observation - Activates the INTERACT Observation mode, which is obligatory to log Observation Codes. |
|
Fast search - allows you to run and view the video at high speed, the speed can be set within the Time control settings. Multiple clicks will multiply the speed. |
|
Speed control - Enables you to change the play speed of the video by increasing (=faster) or decreasing (=slower) this value. ▪Click the value to return the original speed. |
|
Frame by frame - Each mouse click moves the video just one frame, either forward or reverse. |
|
Play selected - Plays the currently selected item(s) exactly from start- to end time code. |
|
Go to Start or Go to End- Positions your video at the first or the last frame with just a single click. |
|
Time Control Settings - To influence default Pre-roll, Search Speed and Step width functionality. |
Note: The time code information can be displayed in HH:MM:SS.MS or as HH:MM:SS:FF for 'Frames'; you can select your preferred display under General - Program - Settings ![]() - Time format.
- Time format.
Additional Video Control Possibilities
Content-based Video Control
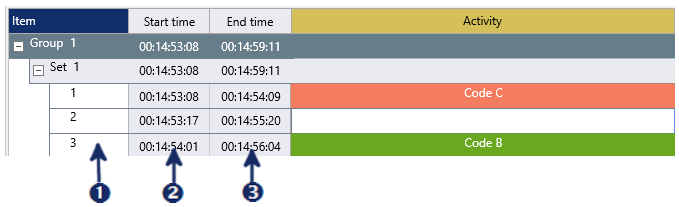
Besides the obvious video controls, INTERACT offers other ways to control your video(s). The most important one is based on the available events:
|
Double click anywhere in line outside the time columns to play the video from start time to offset of that selected event. |
|
Double click on any start time time to position the video at that time value. |
|
Double click on any offset time to position the video at that time value. |
| TIP: | All of these video control commands have default short cuts keys that differ, depending on the operating system you are working on. To get an overview or to alter these shot cuts, go to the application settings, as is described in Shortcut Controls. |
Enter Time Value
If you know exactly at what time you want to position your video (and this information is not available as a time code to click on), it is possible to enter this time value manually:
▪Double-click inside the Timer field.
A new dialog in which you can enter your time value appears.
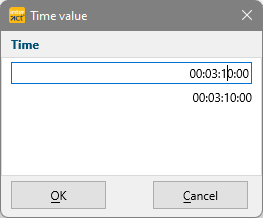
▪Enter the time value you want to go to.
▪Press RETURN on your keyboard.
INTERACT now positions your video(s) to the entered time value.
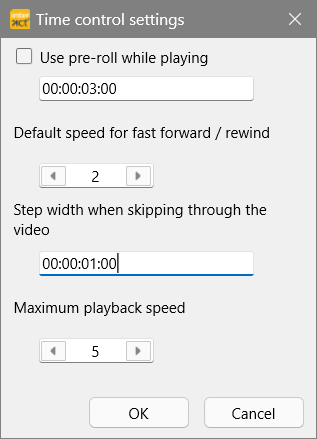
Fixed, Interval-based Steps
In addition to the frame-by-frame-based steps available in the video controls, it is possible to 'jump' through your video at fixed interval-steps, using the LEFT and RIGHT ARROW KEYS on your keyboard in combination with the CTRL key and the Step-Width function.
This allows you to proceed through your video at a preset step size:
▪Click Observation Ribbon - Time Control Settings ▪Define the Step width you need within the third section of this dialog ▪Confirm with OK. ▪Select the Multimedia Progress Bar or a Multimedia Window. ▪Use the CTRL+ARROW LEFT and CTRL+ARROW RIGHT keys on your keyboard, to jump through the video or click in front of (or behind) the position slider inside the Multimedia Progress Bar.
|
 |
IMPORTANT: Either the multimedia window, the Coding panel or the Multimedia progress bar needs to be selected!
Lead Time
In some cases, people do want to see a certain number of seconds preceding the start time of the logged behavioral Event. So you see what happened just before the selected Event, allowing you to focus on the beginning of the actual Event.
This time frame, preceding the actual Event, is called pre-roll. The length of this pre-roll can be set to your needs:
▪To activate this function, select Use pre-roll while playing.
▪Enter your referred time value into the text box, to set the exact pre-roll time interval.
▪Click OK to confirm your settings.
Every time you replay a logged Event, INTERACT now automatically starts the video as many frames or seconds BEFORE the original start time of the selected element.
| TIP: | Press CTRL while double clicking an start time or OFFSET time value in your document to replay only the specified pre-roll period until the clicked time value. This allows you to easily replay the LAST 2-3 seconds of any longer Event or just the few seconds BEFORE the selected Event starts! |
IMPORTANT: Use this functionality with care, in order not to confuse other team members!
Floating Observation Panel
For INTERACT users that prefer a free floating panel, it is possible to detach this Observation Ribbon from the menu. You can position the panel wherever you prefer.
Detach Observation Ribbon
▪Click on the ![]() Move icon inside the Observation ribbon.
Move icon inside the Observation ribbon.
Now the Video Controls are located in a free floating panel:
▪Drag the panel to your preferred position.
Note: The Multimedia progress bar is still located underneath the main toolbar!
Attach Observation Ribbon
INTERACT memorizes the last position and size for your Observation Panel. You can re-position those controls to their original position:
▪Click the Close icon in the upper right corner.
or
▪Click the ![]() Move icon again to close the floating dialog.
Move icon again to close the floating dialog.